Download the App and Prepare Your Environment
Download the app
The first step is to download the new app from site. This is achieved simply by opening the app pinned to your homepage or pointing the chrome browser to the app page at <base domain>/app.
The newest version should download automatically - indicated by the status icon at the top right corner of the screen. Yellow means a download is in progress, green means the download is complete. You should visit the deployment status page by tapping on the status indicator.
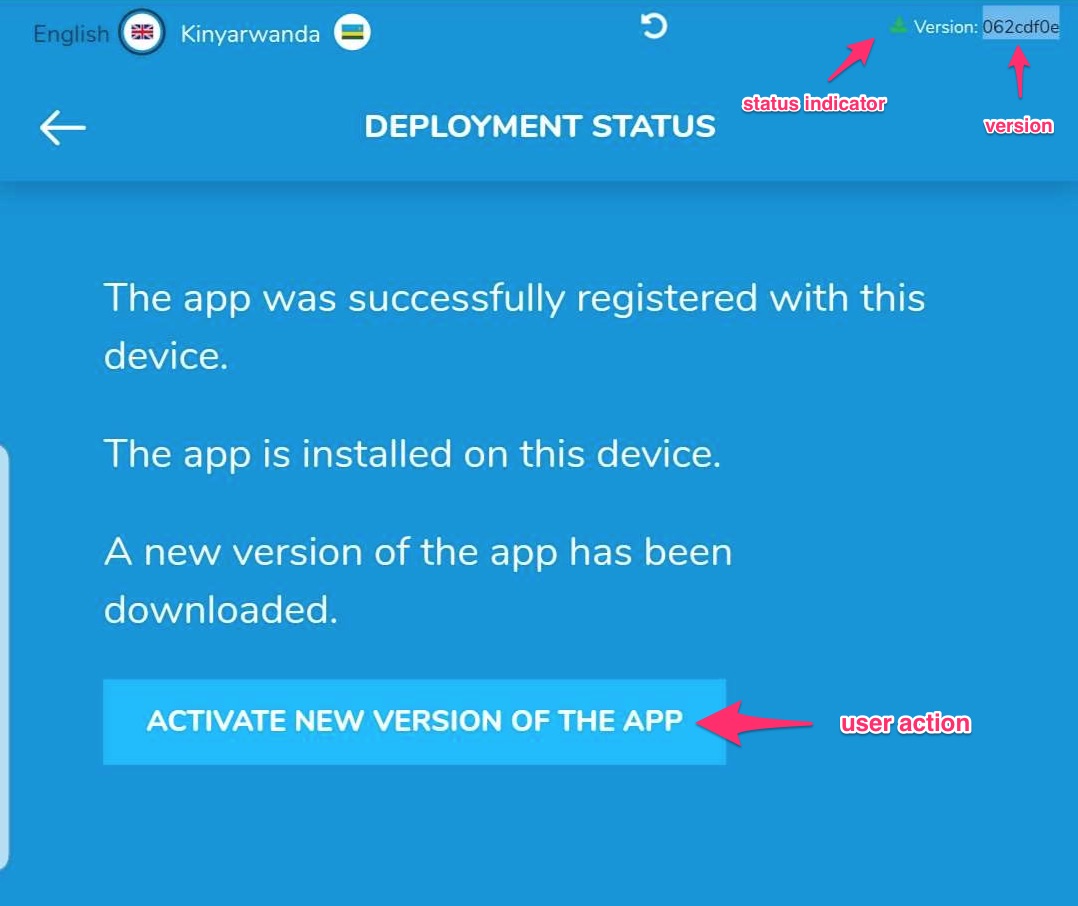
There may be a manual step to activate the new app (like shown above) - in this case, tap on the “Activate New Version” button.
The current version 827d9ba6 should be showing in the top right corner.
Reset the environment
Because this is a major upgrade, we need to be sure that all data from former versions of the application of the device. We will do this by performing a “Clear and Reset” for the URL that serves the application.
On an Android device (the directions are slightly different for a desktop, see below):
- In the chrome browser, go to [the app page at
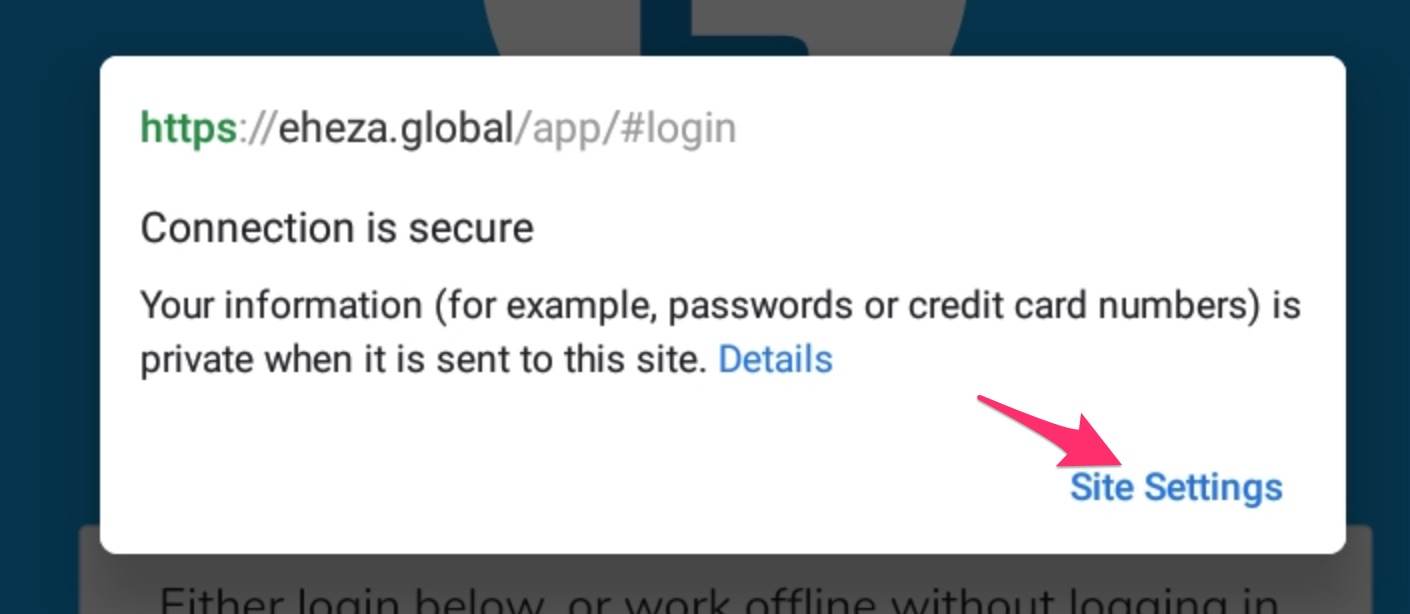
<base domain>/app(do this in the Chrome browser even if you have the app pinned to your homepage on the device). - Click on the Green lock icon just to the left of the address bar in the browser.

- Click on the “Site Settings” button on the following screen.
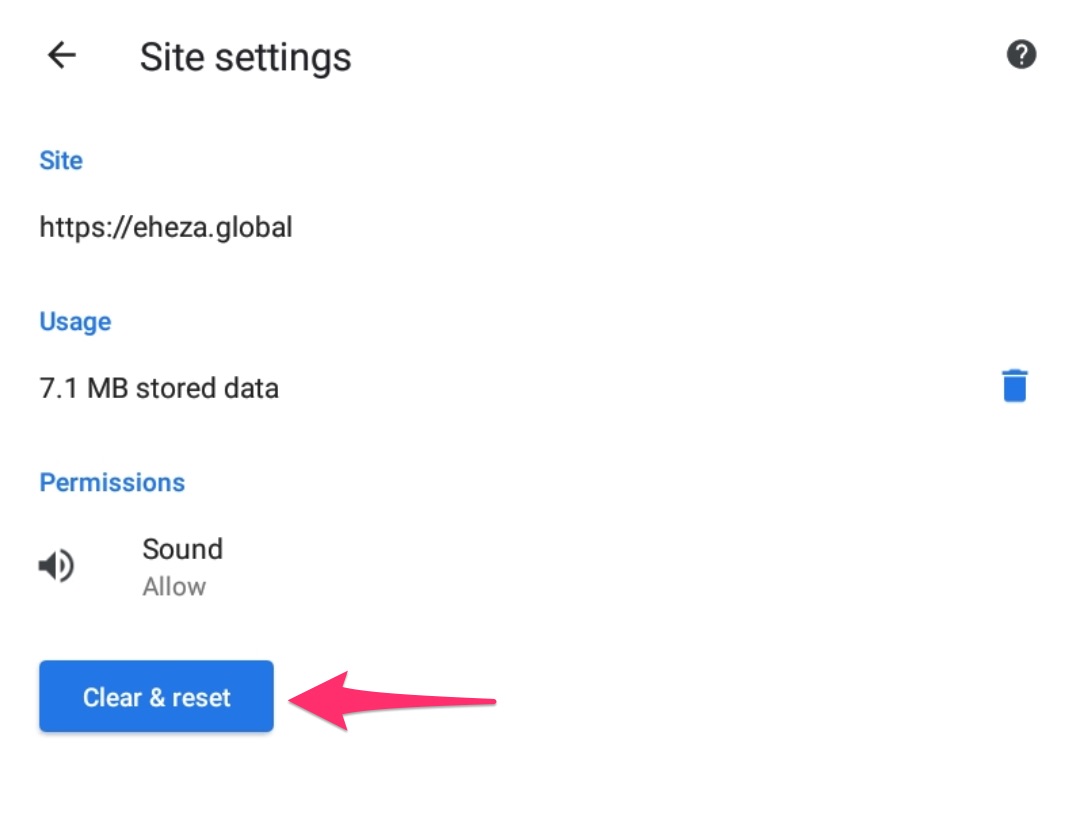
- Click on the “Clear & Reset” button on the following screen.
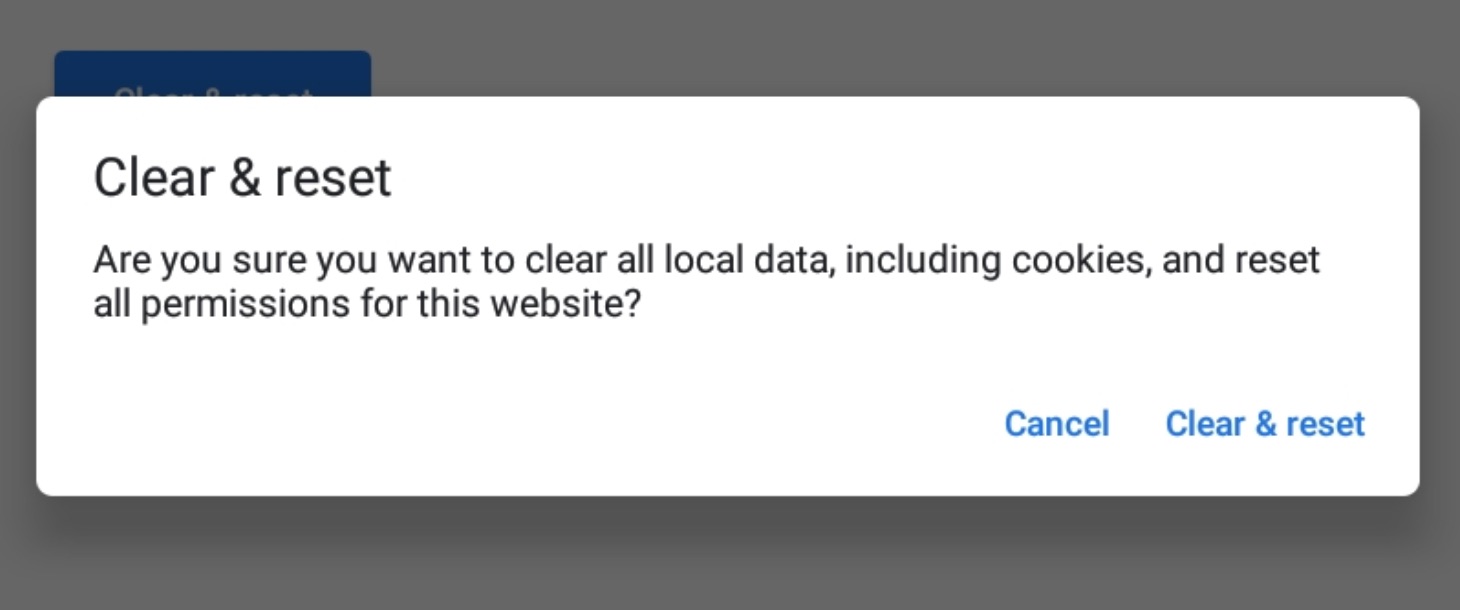
- Click on the “Clear & Reset” again on the confirmation screen.
After this step, you should pin the app to your home screen by clicking on the menu on the top right and choosing “Add to home screen.”
Close the Chrome application - you will continue to access the application through the pinned icon on the home screen.
Pairing a Device
Our new application works a little differently in that devices are now paired to the backend. This makes it easy for nurses to log in and out and for devices to switch between sessions. It does, however require that an admin do a little setup work on the device to get it ready for use.
To pair a device with the backend, you need to create the “Device” on the backend. In the backend menu, go to Content -> Add Content -> Device, and you’ll see something like this:
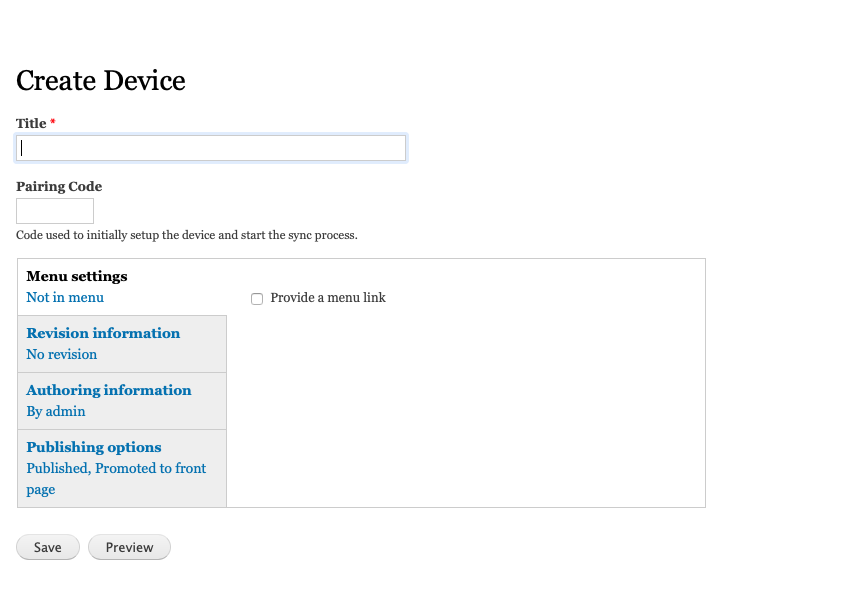
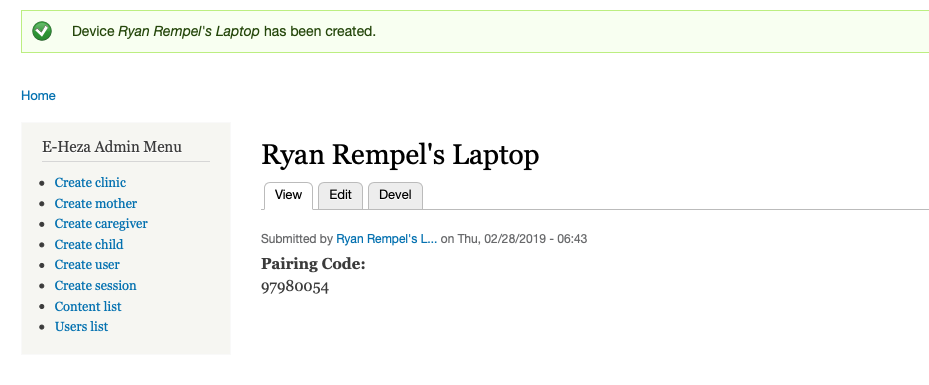
Fill in the name with something that identifies the device (e.g. E-Heza Tablet 1). You can leave the pairing code blank, as it will be auto-generated. Then, you should see something like this – note the pairing code that was generated.
Back on the app on the tablet, you should see this screen:
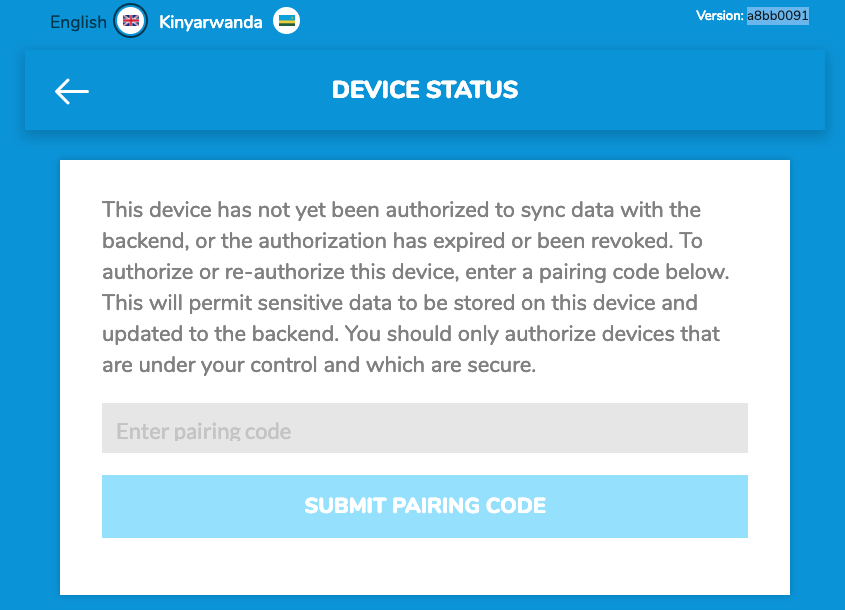
Enter your pairing code.
If you enter a correct pairing code, then the device will start to download data from the backend. We divide the data into two groups. Some data is downloaded to every device, whereas other data is downloaded based on what’s needed for the health center that a device wants to work with. (The purpose is to stay within the limits of what can reasonably be stored on the device).
Troubleshooting the initial sync
You can access the device status page using the icon at the top middle of the screen.
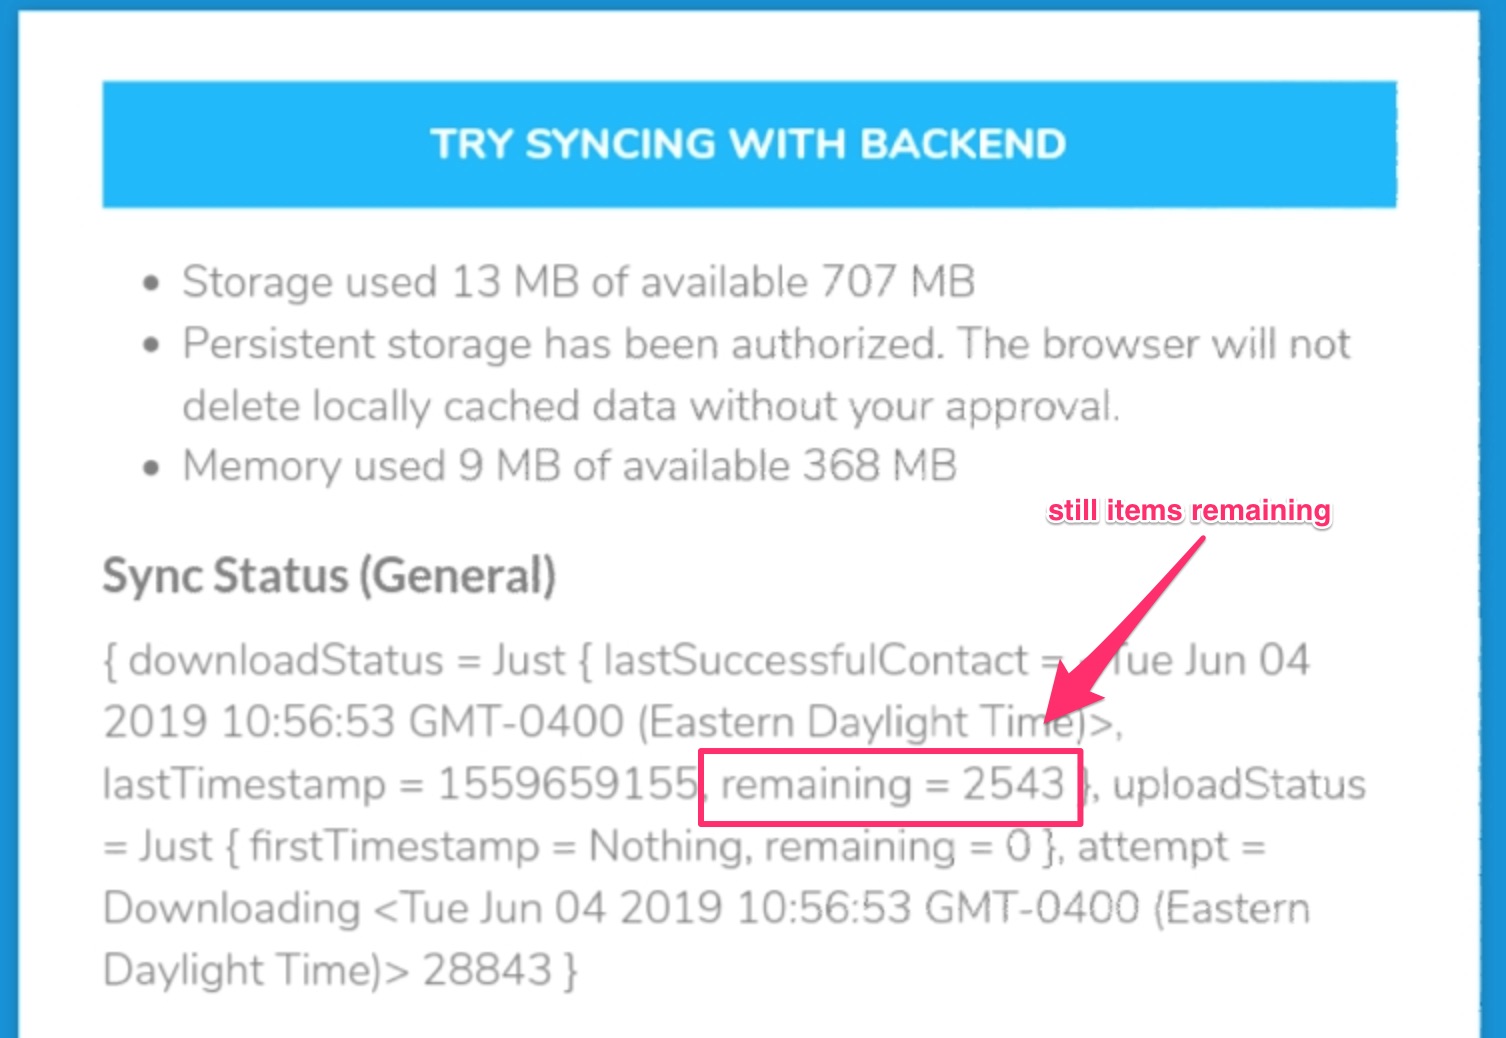
In this step, we are concerned only with the data under the Sync Status (General)
This is what that section looks like when there is still data left to sync:
This is what that section looks like when the syncing is complete:
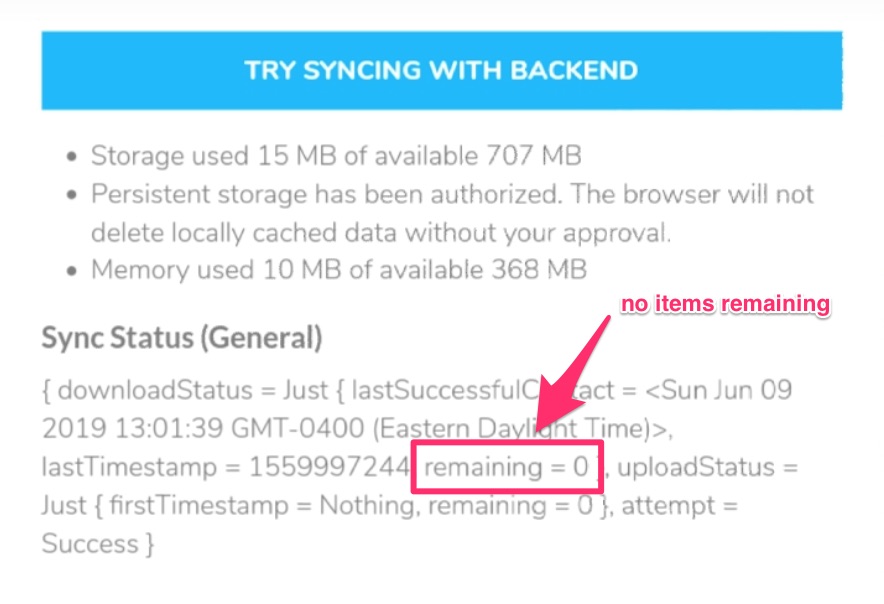
There are a few things to note about the initial sync process:
- A “sleeping” device will not sync - during this step the device needs to be attended and kept in awake mode (or the settings should be changed so that it never goes to sleep)
- The sync can hang at certain intervals. Most of the time the device will recover on it’s own after a few minutes of idleness - in fact, we haven’t had a case yet, where it doesn’t recover. We’ve seen cases where it sits idle for up to 10 minutes.
There are two things you can do to manually recover the sync process: - refresh the app screen (pull down the page for a refresh) - completely exit the app (be sure that it is closed) and open it up again
- You should only attempt to log in (in the next step) to a device that is fully synced.
Logging on to the Device
A couple of notes about login and logout.
- Login is no longer depend on being connected to the Internet. You can login and logout while offline.
- You no longer enter a username and password. Instead, each nurse is given a 4 digit pin.
Pin Codes
There is now a “Nurse” content type on the backend. All the “users” in the former setup have been converted to “Nurse” and given a random PIN code. So, you can look it up in the backend at the base domain. For now, that would be by clicking on the “Content” menu, filtering for “Nurse”, and either clicking on an existing entry, or creating a new one.
All current nurses and each new nurse added to the system must be given their unique pin code in order to login to the tablet.
Main Menu Screen
On the main menu screen after logging in, you have the following options:
- “Logout” would log you out.
- “Select your clinic” would launch you into the familiar previous UI for selecting a clinic. However, we’ll need to go to the “Device Status” page first (the first time).
- “Device status” shows us the status of our contact with the backend. Which health centers are we working with? How recently did we contact the backend? How much data needs to be downloaded? How much data needs to be uploaded?
Device Status (Setting up a Device to work with Health Centers)
We need to start with “Device Status” now, because we need to specify which health centers this device will work with. Here’s what you’ll see at the moment.
From this page you should select the Health Centers that you want synced to this device - you can choose as many as you want, but there is a risk that you will run out of space if you load too many.
Working with a session
We can now go back to the main page, and then choose the “Select your Group” option.
Note that groups are enabled or disabled depending on the user you are logged in as. At the moment, you edit these permissions by editing the “Nurse” entry on the backend. (And then reloading the browser to sync the changes to the client, or just waiting for the next automatic sync).
A couple of notes about this.
- In the past, we only showed a session here if there was one active right now. What this screen does instead is show recent and upcoming sessions – any session that is active now, ended less than a week ago, or will start in less than a week.
- In the past, we could only interact with one session at a time. That is no longer the case – technically, we can interact with any “open” session now.
For open sessions, you can now click on the “Attendance” button, and you’ll get to the familiar “attendance” screen.
Click on the check-boxes to mark mothers as present (just like you used to), and then click on the icons at the top to start entering measurements etc., just like you used to. The big difference is that the things you enter are being periodically synced to the backend. In the past, we only saved things to the backend at the end, when you “uploaded” the session. There is now no separate “upload” step – things are being continuously uploaded periodically as you work.
There is also no “download” step. You used to have to specifically download a session in order to work with it offline. Now, downloading happens periodically.
Now, before you set out to a remote area that has no Internet connectivity, you still might want to check the “Device Status” page to make sure that your device is up-to-date, of course. And, once you return, you might want to glance at the “Device Status” page to see whether your work has been uploaded. But, it happens automatically.
To end a session, there is still an “End Session” button:
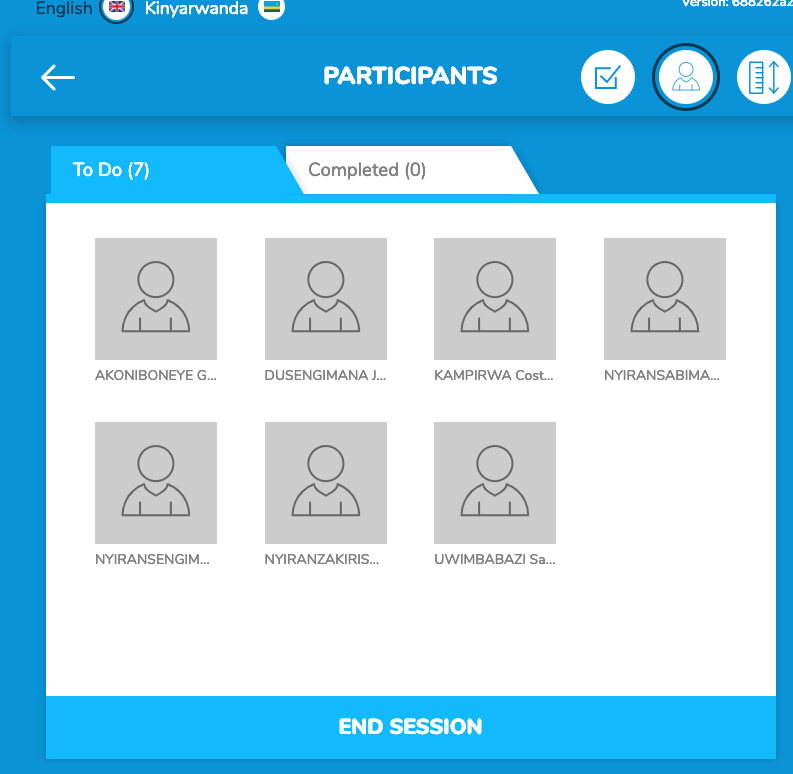
Which, when you click it, shows this:
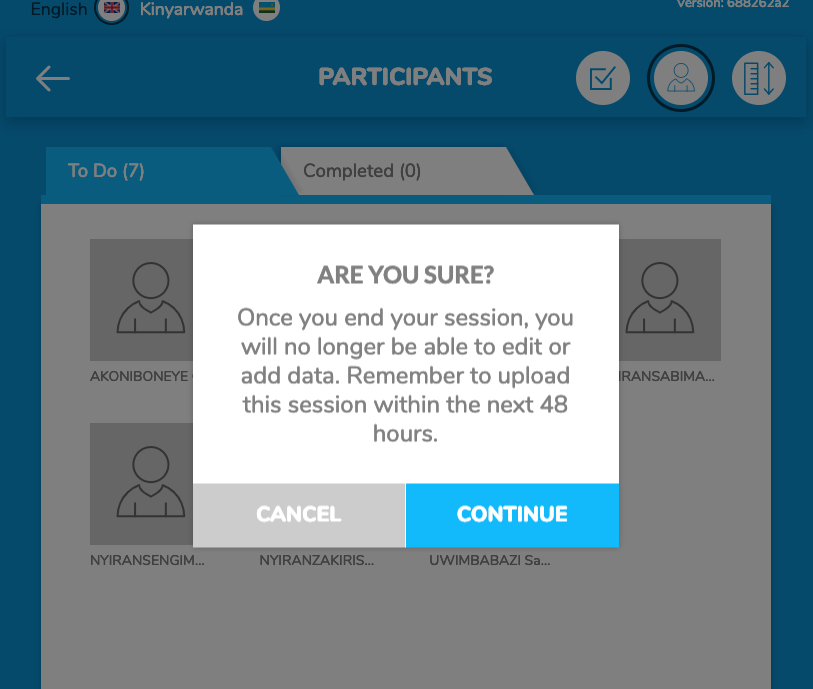
If you click on “Continue” (to close the session), then you get taken back to the clinic page, which now shows the session as being closed:
And, of course, that data is automatically uploaded to the backend.
Last Modified: 1 January 0001
